AI Model Deployment: Expert Strategies with Microsoft Azure

Intro
The appearance of cutting-edge Generative AI technology has ignited immense excitement among enterprises. As interest in this technology skyrockets, it becomes crucial for organisations to grasp its benefits. In this blog post, we’ll dive into the process of model selection and demonstrate how it can be operationalised within Microsoft Azure.
Our primary objectives are:
- Handpick a pre-trained model with accurate performance, eliminating the need for tedious training procedures.
- Encapsulate the model into a RESTful API, ensuring streamlined accessibility and usability.
- Operationalize the model within the infrastructure of Microsoft Azure, enabling users to perform scoring operations directly from their web browsers.
Model selection
The choice of an appropriate model heavily relies on the problem at hand. In this case, we will focus on a captivating yet challenging task:
Auto-generating captions from images
Images have become ubiquitous across websites, blog posts, and social media platforms. Adhering to best practices, we annotate these images with “alt_text”, providing text descriptions to assist visually impaired users in understanding the image’s content.
For auto-generating captions from static images, numerous options already exist, including the Microsoft Azure Cognitive Services Vision API. However, I find the output of such services to be overly simplistic. Furthermore, I want a “Vision to Language” (VTL) model. What does this mean? By augmenting a text-based Large Language Model (LLM) to include imagery (we’ll restrict our discussion to images and won’t deal with video), we unlock the possibility for starting conversations with the model about the image’s contents, enriching the captioning process.
Huggingface.co boasts a wide range of Vision to Language models, among which I’ve selected GIT (GenerativeImage2Text), developed by Microsoft Research and proposed in the accompanying paper. From the paper’s extract:
GIT is a Transformer decoder conditioned on both CLIP image tokens and text tokens. The model is trained using “teacher forcing” on a lot of (image, text) pairs.
It’s pre-trained and ready to go. Let’s do this 🏎️ !
Utilising the model
The model we’ll be utilising is already trained and readily accessible. While training the model from scratch is an option, it is advisable to leverage pre-trained models unless your dataset has unique characteristics necessitating custom training.
From a software architecture standpoint, we will wrap the model into an API controller, like this:
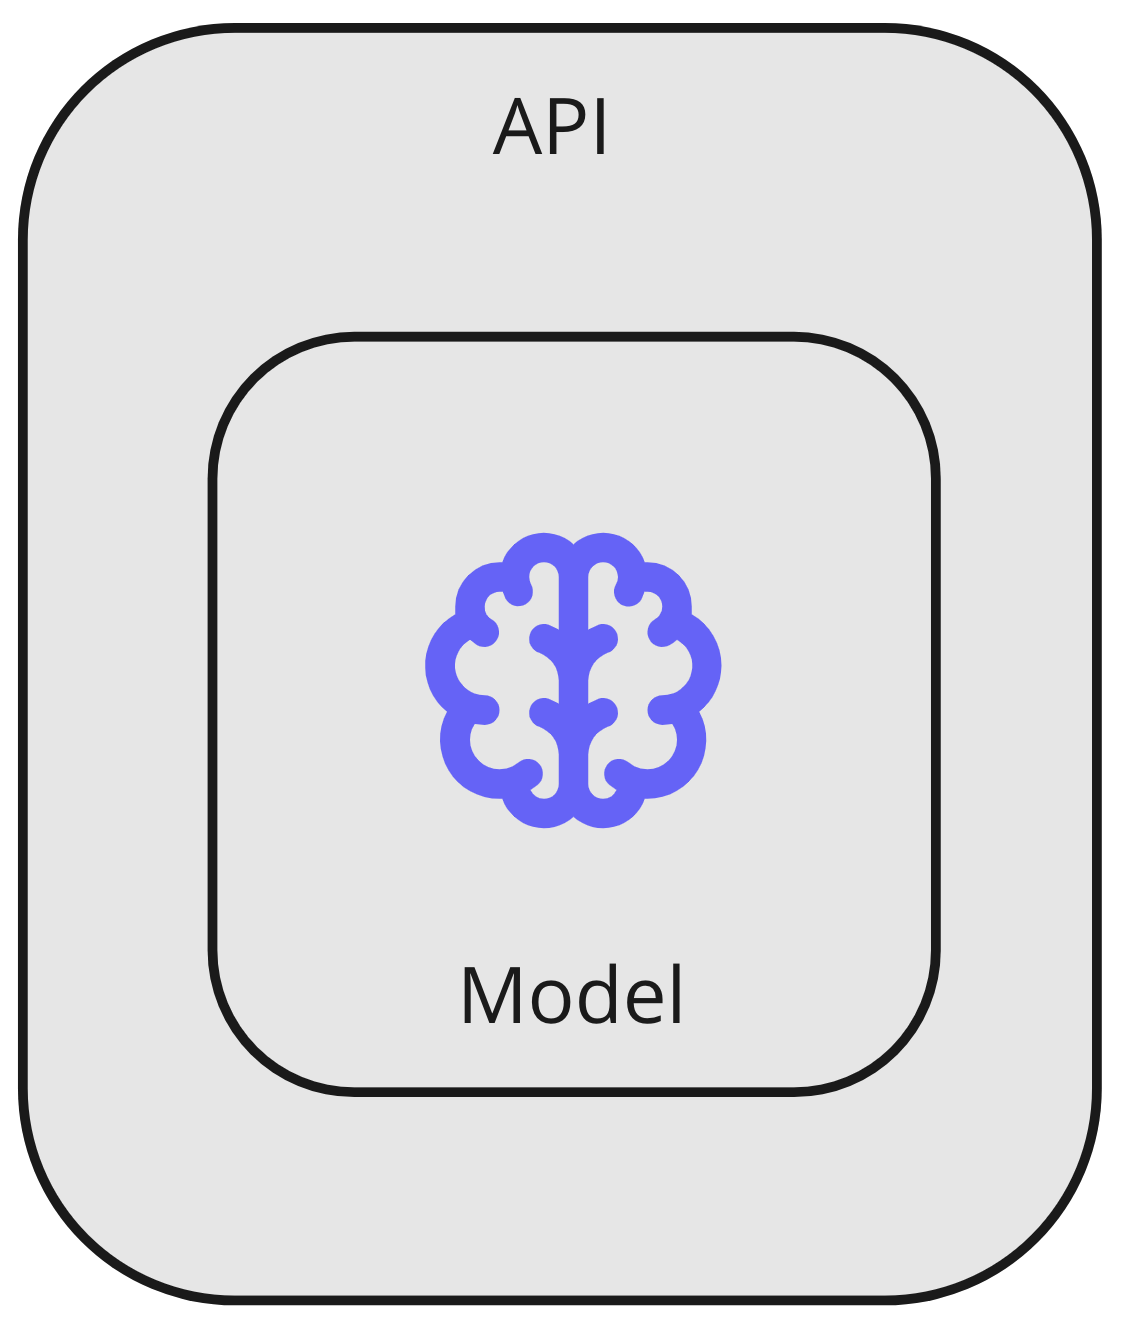
The model will be exposed to users via a RESTful API, requiring the entire model to be accessible within the localhost environment for scoring. Consequently, we will include the model’s binary in the source code repository and directly reference it from the Python scoring module through the filesystem:
1
2
3
4
5
6
7
8
9
10
11
12
13
14
15
16
17
18
File: scoring.py

from transformers import AutoProcessor, AutoModelForCausalLM
import requests
from PIL import Image

def score(image: bytes):

   # Use assets of the model from the local filesystem
   processor = AutoProcessor.from_pretrained("./../model/git-base-textcaps")
   model = AutoModelForCausalLM.from_pretrained("./../model/git-base-textcaps")

   pixel_values = processor(images=image, return_tensors="pt").pixel_values

   generated_ids = model.generate(pixel_values=pixel_values, max_length=50)
   generated_caption = processor.batch_decode(generated_ids, skip_special_tokens=True)[0]
   return generated_caption
Leveraging Git LFS (Large File Storage) becomes essential for effectively managing the sizeable 700MB trained model file. Git LFS ensures smooth tracking of such files throughout the development process.
To obtain accurate scoring results, simply invoke the score() method in the scoring.py file, providing a valid URL parameter. The result will be a well-formed image caption. On my Mac with an M1 processor, the scoring process typically completes within approximately 4 seconds, delivering prompt results.
Wrap the module in an API
We now have the model accessible from a wrapper. This wrapper is isolated in its own file, which makes writing tests for it easier. We now need to wrap this module (scoring.py) into an API. For that purpose, I will use the FastAPI library.
1
2
3
4
5
6
7
8
9
10
11
12
13
14
15
16
17
18
19
20
21
22
23
24
25
26
27
28
29
30
31
32
33
34
35
36
37
38
39
File: main.py

import validators

import scoring

from fastapi import FastAPI, HTTPException
from fastapi.middleware.cors import CORSMiddleware

def validate_url(url):
   if validators.url(url):
       return True
   else:
       return False

app = FastAPI()

@app.get("/caption")
def get_endpoint(url: str):
   try:
       # Validate that the URL is valid
       if not (validate_url(url)):
           raise HTTPException(status_code=400, detail="Bad URL provided")

       # Retrieve the image from the URL as 'bytes'
       try:
           image = scoring.retrieve_image(url)
       except Exception as e:
           raise HTTPException(status_code=500, detail="Failed to retrieve image")

       # Score the image
       try:
           return scoring.score(image)
       except Exception as e:
           raise HTTPException(status_code=500, detail="Failed to score image")

   except Exception as e:
       print(e)
       raise HTTPException(status_code=500, detail="Internal server error")
Now you can run this API via uvicorn, and send GET requests to the endpoint /caption to score an image, like this:
1
2
3
Run: uvicorn main:app
Request: GET http://127.0.0.1:8000/caption?url=https://option40.com/uploads/pexels-photo-4968660.jpeg
Result: "a woman holds up a fan of money that says \" 20 cents \"."
At this point, we have wrapped the trained model into a Python module and wrapped that into an API. This all runs well on our local machine, but we now need to package this for operationalisation in Azure.
Building a Docker Image for Azure
Leveraging the versatility and portability of Docker, I’ve opted to encapsulate this Python code in a Docker image. Docker containers offer unparalleled flexibility in choosing the runtime environment. However, utilizing Docker images does pose certain challenges concerning resource allocation (CPU/RAM) and GPU acceleration access. Rest assured, we’ll address these challenges in due course.
Now, let’s proceed with building the Docker image. To do this, we’ll incorporate the following Dockerfile into the repository.
1
2
3
4
5
6
7
8
9
10
11
12
13
14
15
16
17
18
19
20
21
22
23
24
25
# Use a base image with Python installed
FROM python:3.11.3-slim

# Set the working directory inside the container
WORKDIR /app

# Copy the Python script and model files to the container
COPY requirements.txt ./requirements.txt

# This is needed for some packages to be installed
RUN apt-get update && apt-get install -y gcc python3-dev

# Install dependencies
RUN pip install --no-cache-dir --upgrade -r requirements.txt

# Copy rest of assets
COPY src/ ./src/

# Copy the model
COPY ./model/git-base-textcaps ./model/git-base-textcaps

WORKDIR /app/src

# Set the command to run your script when the container starts
CMD ["uvicorn", "main:app", "--host", "0.0.0.0", "--port", "8000"]
Running the Model on Azure
There is an abundance of options available in Azure for running a container image. You can select from Azure Web Apps, Azure Container Instances, Azure Kubernetes Service, Azure Container Apps, or Azure Functions for Containers. Each of these services can host our scoring container effectively. However, for fast deployment and cheaper access to compute, I recommend utilising Azure Container Apps in the Consumption plan (at least for experimentation purposes. We’ll talk later about selecting a service for Production environments).
The Consumption plan proves advantageous for an application with significant idle periods, as Microsoft exempts compute charges during periods of inactivity.
Once you’ve successfully built your Docker image, proceed to push it to an Azure Container Registry. From there, you can easily initiate the container using the following Azure CLI commands:
# Use environment variables to substitute all these values

# Create container app environment
az containerapp env create \
 --resource-group $RESOURCE_GROUP \
 --name $ENVIRONMENT \
 --location $LOCATION

# Create container app
# Less hardware than this will make the container crash
az containerapp create \
 -n $API_NAME \
 -g $RESOURCE_GROUP \
 --image $ACR_IMAGE \
 --environment $ENVIRONMENT \
 --cpu 1 \
 --memory 2.0Gi \
 --min-replicas 0 \
 --max-replicas 1 \
 --registry-username $ACR_USERNAME \
 --registry-password $ACR_PASSWORD \
 --registry-server $ACR_SERVER

# Enable ingress controller to make the app publicly accessible
az containerapp ingress enable -n $API_NAME -g $RESOURCE_GROUP --type external --target-port 8000 --transport auto
To ensure proper SSL certificate management and enhance the security of your Azure Container App, it is advisable to leverage Azure Front Door. Azure Front Door offers comprehensive SSL certificate management and rotation. Additionally, the Premium variant provides additional security features for your application.
How to configure Azure Front Door with an SSL certificate and a custom DNS name goes beyond the scope of this post. However, once properly set up, you can access your scoring engine on a secure, custom URL, like this one:
https://captionizer.option40.com/caption?url=https://option40.com/uploads/pexels-photo-4968660.jpeg
At this point, we have implemented the following architecture:
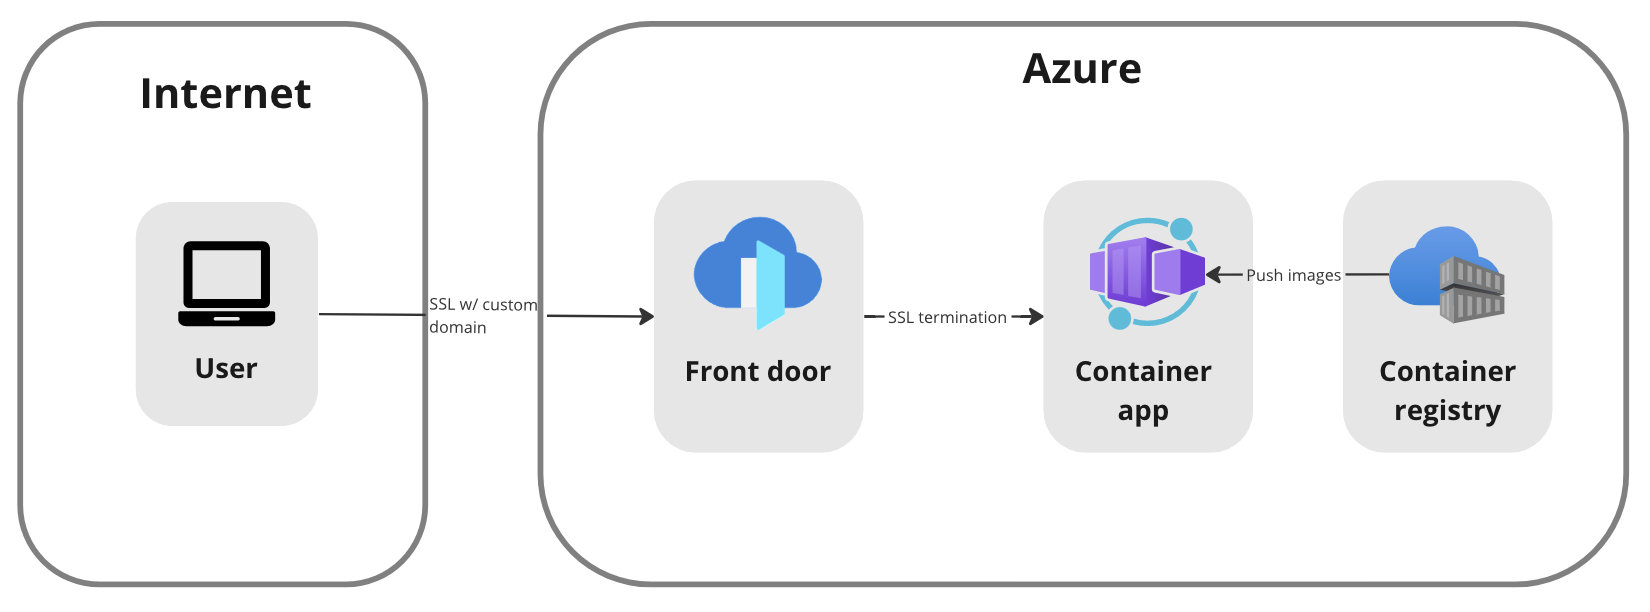
It’s a quite simple architecture, but effective and cost-efficient.
Performance
To ensure reliable execution, the model must fit into memory. Our model’s size is 700MB. Therefore, it is essential to have at least 1.5GB of RAM on the host, with 2GB being the safer option. Insufficient memory will result in the model crashing during scoring operations. Sufficient memory is required to load the model and its weights into memory.
For this container app, we have allocated minimal hardware specifications: 1vCPU with 2GB of RAM. These specifications should suffice for the task at hand.
I measured the following performance counters (remember, this host does not have GPU acceleration):
Cold start: 25 seconds Scoring: 18 seconds
As of the time of writing, Azure Container Apps does not support GPU acceleration. Given that ML/AI models significantly benefit from GPU utilization, the availability of GPUs in Azure introduces complexities. Not all services support GPU acceleration, and even those that do may have limitations on region availability or the maximum number of GPUs available for your subscription. Careful consideration is required to select the appropriate service to host your model, ensuring compatibility with GPU requirements. For Production environments, you should carefully evaluate your GPU requirements and the limitations imposed by Microsoft on your chosen region and Azure service. You might be required to host on a different service, or even move your solution to another region.
Conclusion
The quickest and fastest way to operationalize a pre-trained model includes the following steps:
- Write a custom module to wrap the model in your own code. Ensure that the model and its weights are available locally, which means you will have to put them in local disk. This also helps with testability and maintenability.
- Wrap this custom module around an API.
- Take this API and package it as a Docker image.
- Choose an Azure hosting runtime that supports Linux containers and (optionally) offers GPU access.
- Deploy your model from a private Azure Container Registry into your chosen runtime.
- Expose your API through Azure Front Door.
- (Optional) If you want to increase the security of the solution even further, consider putting all these resources inside the isolation of an Azure VNet, with Front Door being your entry point into the environment.
Source code
The source code to run this model is available here:
https://github.com/Option40AG/captionizer
API availability
You can watch this model score by yourself, by sending a request to the following endpoint:
1
GET https://captionizer.option40.com/caption?url={URL of an image}
Example:
1
GET https://captionizer.option40.com/caption?url=https://option40.com/uploads/pexels-photo-4968660.jpeg
Happy coding 📌